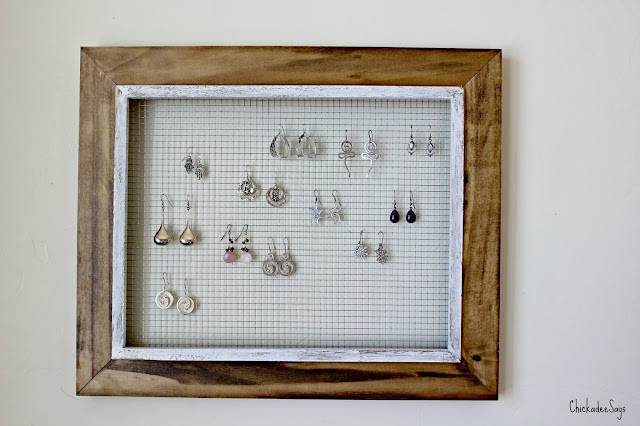
When it comes to jewelry, I take after my mother in the way we just happen to chuck everything into a box and be done with it. Usually this leads to us wearing the same set of jewelry day after day because we can be bothered to sift through a pile of goodies.
So, instead of buying a Christmas present this last year (yes, these pictures are that old- I forgot I had photographed the process!) I made my mom a jewelry display for all of her dangly earrings! So, if you are anything like we are and are looking for a cute DIY for summer this is a super inexpensive way to organize!
Materials:
Photo Frame of Your Choice
Fine Wire Mesh (I got a 23 gauge roll at Home Depot)
Staple Gun with Staples
Gorilla Glue
Ultra Thin Wooden Boards (Mine are craft wood from Michaels)
Clamps
Towels for Wiping Excess Glue
¼ to ½ Inch Nails
Heavy Duty Scissors or Wire Clippers
Instructions:
1. Remove glass and paper backing from the picture frame, reserve the paper backing with hanging hardware.
2. Fit the wire mesh to the back of the picture frame and snip off excess.
3. Using the staple gun staple each corner, pulling the wire tight.
4. Continue stapling all the way around so that the wire lies flat.
5. Cut the craft wood so that it fits onto the back of the frame, covering the wire but not visible from the front of the display (Align with the wooden frame).
6. Line the wire mesh with glue on all four sides.
7. Place the craft wood over the glue lines and clamp firmly into place.
8. Wipe of excess glue and allow to dry completely.
9. Remove the hanging hardware from the photo’s paper backing and use that hardware to nail onto the back side of the photo frame.
10. Remove clamps and display!
The layer of craft wood allows room for dangling earring backs to hang beautifully while protecting the wall it is hanging on. How do you organize your jewelry? Let me know in the comments below!
I was compensated with product, payment or both in order to facilitate this post.
Some links may be affiliate links. All opinions are my own.


